I got the idea about this post after seeing a well known youtuber struggling soldering connectors to his coax. Ending in a short inside one of the connectors a few videos later. And yes, I hate those so called "new" "watertight" style UHF (PL259). At a certain moment you have to slide a kind of metal head into the outer screen of the coax. It looks easy when a pro does it. Like in this video from M&P. But it isn't easy and faults are easily made when you're not experienced. Although I have to tell that I really like the design of M&P evolution UHF connector, I'm shure this is a high quality connector that will last for many years. Especially the heat stress on the coax can be avoided with this type of connector, and a big pro is that the connector can easily be salvaged if needed.
However, I still have a bag full old salvaged UHF connectors and even new "old style" ones. In the past.....well 10 years ago I installed them like this:
Resulting in a few issues with the connection of the screen to the connector especially when it ages.
Then a few years ago I read about the K3LR (famous contester from the USA) style UHF connector install. I have to say, I really like this style and adopt it since a few years. Best description how to install K3LR style can be found in this document:
http://www.nelarc.org/files/pl259.pdf
Basically the outer screen is not soldered through the soldering holes but at the backside of the connector. However, in practice, of course things will work out different. So, I got a few tips.
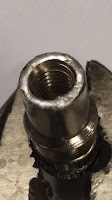
First of all file and clean the backside of the connector for easier soldering
Second tin the backside of the connector. Don't apply too much.
Personally I prefer to solder the outer screen only to the backside and don't fold it over the connector. This is a choice of course. I think it is easier to slide a heat shrink tube over it this way.
Nice and tidy result. And if needed the connector can easily be salvaged.


I also solder the sheath to the base. It's a *lot* easier and involves less potential heat stress somwhere, if the base of the connector is heavily sanded with coarse sandpaper or a rotary sanding tool to remove the chrome coating, which doesn't solder easily. Then apply solder to the base before the cable is in. Only modest heat is then needed to later melt the solder and blend the outer screene into it for a fix. As you say, any covering has less room to be fitted this way, but it's fine if you only apply a fairly small amount of solder, rather than a blob!
ReplyDeleteGood morning Bas, I too like Photon solder the sheath as well. After everything is connected, I don't want issues. As Murphy would have it the issue would have been at the antenna's end during a rain or snow storm. The heat shrink is a good idea as well to add an extra layer of protection.
ReplyDelete73 and have a good weekend,
Mike
VE9KK